
Orchid leaves turn yellow due to the roots dying, which hinders the transportation of water and nutrients, leading to stress from overwatering or drought, and can also be caused by temperatures below 55°F or sunburn.
There are several typical causes for orchid leaves to become yellow:
Orchids are prone to root rot if they are watered too frequently, so it is recommended to only water them once every 7-14 days.
- The orchid is susceptible to root rot when planted in a potting medium that holds excessive moisture, such as moss or regular potting soil, and therefore, it is recommended to use a potting medium made of pine bark chippings to avoid this issue.
- Orchids cannot survive in pots that lack drainage holes at the base because they are intolerant of water accumulation around their roots, which can occur when decorative outer pots without drainage or saucers and trays that trap water are used, as water must be able to escape freely from the pot’s base.
- If an orchid is not watered frequently or given insufficient water, its roots will die, leading to a lack of nutrients and water supply to the leaves, resulting in yellowing of the leaves.
- Orchids are sensitive to sun damage, so it is recommended to place them in bright, indirect light to avoid scorching their leaves and turning them yellow.
- Orchids need a specific type of fertilizer because regular houseplant fertilizer can damage their roots and cause their leaves to turn yellow.
- Orchids are highly sensitive to cold temperatures, and any temperature below 55°F can cause their leaves to turn yellow.
- When orchids are repotted, they may experience transplant shock or root rot, which can cause a fluctuation in conditions and lead to yellowing leaves as a sign of stress.
If your orchids are turning yellow, it is usually because their roots are deteriorating or because they are not in an environment that suits their adapted preferences, but don’t worry, continue reading to discover how to rescue your orchid.
Orchid Leaves Turning Yellow due to Root Rot (Overwatering)
When orchid leaves become yellow, it is usually due to root rot, which is caused by overwatering or soils that drain slowly, as the soil becomes saturated, the roots of the orchid are deprived of oxygen, leading to their death, and as a result, the dying roots are unable to transport water and nutrients throughout the orchid, causing the leaves to turn yellow.
Epiphytic orchids grow on trees or in loose aggregates instead of soil.
Orchids need a potting medium that is well-ventilated to ensure sufficient oxygen flow around the roots, which is crucial for their respiration and proper functioning.
Orchids have evolved to thrive in environments that have good drainage, and they cannot withstand having their roots submerged in moist soil, which leads to root decay.
Overwatering orchids can reduce the amount of oxygen around the roots, which is necessary for root respiration, and create an environment that encourages root rot, leading to the death of the roots and the inability to transport water and nutrients to the rest of the plant, resulting in yellowing leaves as a sign of distress.
Potting mixtures that hold excessive moisture, like regular potting soil and moss, can lead to the same outcome as overwatering by restricting the oxygen supply around the roots, causing them to wither and die, and ultimately causing the leaves to turn yellow.
The potting mediums used for orchids need not necessarily hold excessive moisture, but they may be too dense and lack the necessary porousness that the orchid roots require to function effectively.
The most suitable potting medium for orchids is pine bark, which closely mimics their natural growing conditions.
The ample dimensions of the pine bark fragments enable sufficient air movement to flow around the roots, facilitating effective respiration, and encouraging exceptional drainage, thereby considerably decreasing the likelihood of root decay, even if you tend to overwater your orchid.
The pine bark chippings have the ability to soak up moisture, which eventually evaporates, allowing the roots to take in the water vapor, thus imitating the natural process by which orchids absorb water in their original habitat.
The roots of orchids can suffer from a lack of oxygen and excess moisture when grown in moss and potting soil, which have smaller particles and retain more water, leading to yellowing of the leaves.
How to Save Orchids with Yellow Leaves due to Overwatering
- To prevent orchid leaves from turning yellow, reduce watering to once a week if you have been watering them multiple times a week, and only water when the top inch of the potting medium is dry, with a recommended watering frequency of once a week in Spring and Summer and once every 2 weeks in Fall and Winter to avoid root rot, although this can vary depending on various factors, so refer to an article on how to water orchids to determine the appropriate watering frequency for your orchid based on the time of year and specific conditions.
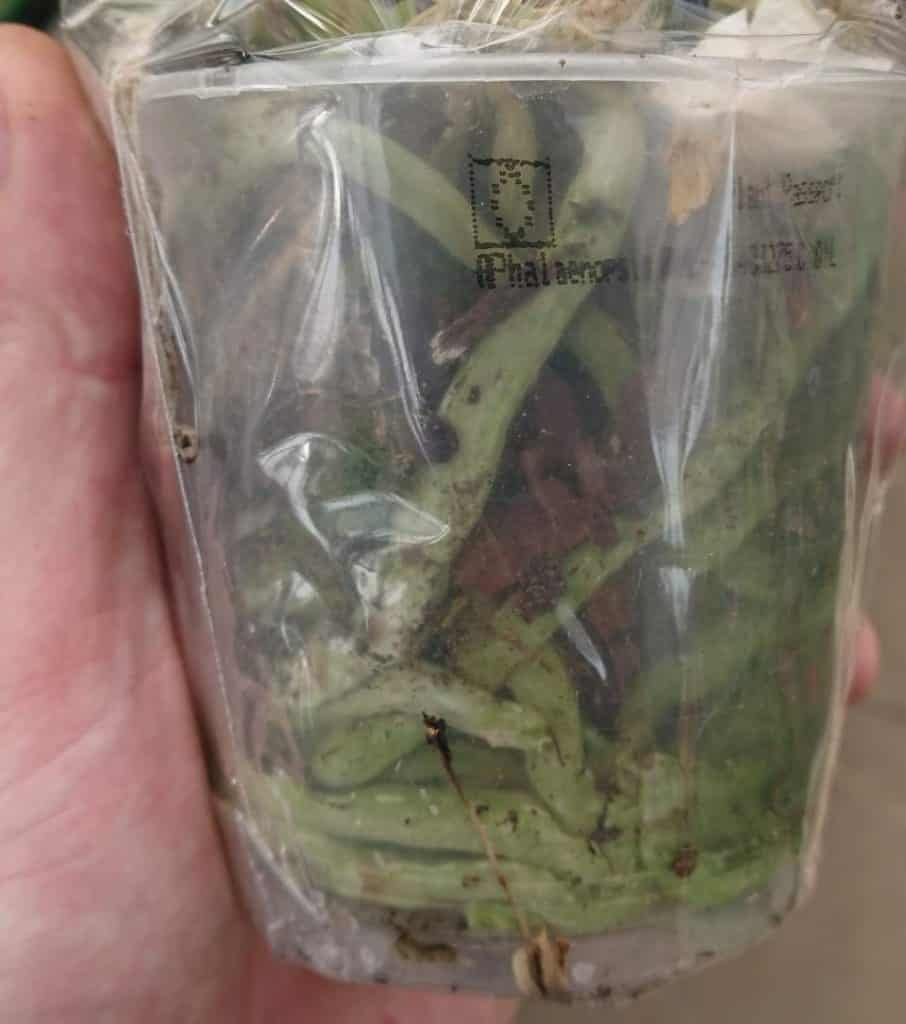
- To inspect the roots of an orchid, take it out of the potting medium and check for healthy green or light gray roots that feel plump, indicating proper function and hydration, while thin, shriveled, papery, brown, yellow, or bad-smelling roots are signs of rot and decay that can spread and should be cut back to save the orchid.
- To prevent the spread of rot, it is recommended to remove any roots that are diseased or dying, especially those that are yellow, brown with a mushy texture, or completely shriveled, as they are unable to transport water or nutrients and can cause yellow leaves.
- To revive an orchid, it is recommended to use a sterile pair of pruners or scissors to cut the dying roots back to the base of the plant or healthy tissue, which may seem drastic, but orchids are actually quite resilient and can grow new, healthy roots that are capable of absorbing the necessary moisture and nutrients.
- To avoid root rot caused by fungal pathogens, it is crucial to replace the potting medium of your orchid with pine bark or a prepared orchid potting mix, and it is recommended to do so every two years, even if it is already planted in pine bark, as organic matter breaks down over time, reducing aeration and drainage around the roots.
After trimming away any withering or infected roots and transferring the orchid to fresh potting material, the plant will have an opportunity to generate fresh, robust roots and eventually regain its health.
If the yellow leaves of an orchid do not recover and instead turn brown and fall off, the plant can still grow new healthy green leaves as long as it has healthy roots and is given proper care.
Check out this informative video on YouTube that provides a step-by-step demonstration on how to save orchids suffering from root rot.
Should I Cut Yellow Orchid Leaves Off?
It is advisable not to remove yellow orchid leaves by force or cutting them off since they will eventually fall off on their own after dying back due to insufficient nutrients, and attempting to remove them may cause unnecessary harm to the plant.
Normally, the leaves of orchids will become yellow, wither, and eventually turn brown before falling off on their own; however, when this happens naturally, the spot where the leaf was attached will be sealed over, preventing an open wound, which is what occurs when the leaf is forcibly removed from the plant.
It is advisable to allow yellowing leaves to fall off naturally instead of forcefully removing or cutting them, as doing so can result in wounds that may get infected by fungal pathogens.
After the yellow orchid has finished flowering, it is safe to trim its stems back to the base of the plant, and if you are experiencing this issue, I recommend reading my article titled “Orchid Stem Turning Yellow?” for further guidance.
Orchid Leaves Yellow and Wrinkled (Drought Stress)
If orchids are not watered frequently enough, watered too lightly, or exposed to low humidity, their leaves will turn yellow; furthermore, underwatering orchids can lead to the roots turning white, shriveling, and dying back, which prevents them from transporting water and nutrients to the orchid, ultimately resulting in yellowing leaves.
Although orchids do not need to be watered as frequently as other indoor plants, it is important to thoroughly saturate the potting medium during each watering session to enable the orchid roots to access the moisture and take in water vapor from the air that envelops them.
To prevent drought stress and yellow leaves, it is important to ensure that the entire potting medium is evenly moist after watering the orchid, as watering it too lightly will only moisten the top inch or so of the medium.
To fulfill the watering needs of orchids, it is recommended to water them once a week in Spring and Summer and once every two weeks in Fall and Winter.
When you water your orchid, its roots should look green and then gradually turn light grey over the next week, while also feeling plump and healthy.
When orchids are not given enough water, their roots become dehydrated and shrink, resulting in a thin, delicate, and ultimately dying root system.

When the roots of a plant experience water scarcity, they eventually wither away, leading to a malfunction in their ability to carry essential nutrients and water to the leaves, resulting in the yellowing and shriveling of the leaves.
Orchids are used to growing in environments with a humidity range of 40-60%, so when the humidity is low, it can cause the leaves to turn yellow.
The moisture content in our houses is usually much lower than required, leading to the loss of moisture from the leaves and causing drought stress that ultimately leads to the yellowing of leaves.
How To Save Orchids With Yellow Leaves Due to Underwatering
- To ensure that the roots of your orchid plant receive the necessary moisture, immerse the pot containing the orchid in a basin of water for approximately 10 minutes, making sure that the root ball is completely covered, which will allow the water to penetrate the potting medium effectively, and then take out the orchid from the basin after the specified time and let the extra water drain out of the pot’s base.
- To keep your orchids healthy, it is recommended to wait until the top layer of the potting medium is dry before watering, which usually takes about a week, and when you do water them, make sure to give them a thorough soak either by placing them under a faucet or in a basin of water to ensure that the potting medium is evenly moistened.
- To maintain healthy green leaves and prevent root rot, it is recommended to water orchids once every 7 days during Spring and Summer, and once every 14 days in the Fall and Winter, making sure that the top inch of the potting medium has dried out before watering again.
- To maintain the health of your orchid, it is recommended to mist its leaves, stems, and roots every other day, especially when it is experiencing drought stress, as this will help increase the humidity in the surrounding air and create a humid micro-climate that mimics the orchid’s natural habitat.
- To guarantee the optimal growth and flowering of your orchid, it is important to place it in a room with a suitable temperature and away from any heat sources or air currents that may affect it negatively; ideally, the temperature should range from 55°F at night to a maximum of 75°F during the day, as temperatures that are too high or fluctuate significantly due to indoor heating can lead to increased evaporation from the potting medium and faster moisture depletion from the leaves than the roots can absorb, resulting in drought stress that can ultimately kill the roots and cause the leaves to turn yellow.
- To prevent your orchid leaves from turning yellow due to low humidity caused by air conditioning and draughts, it is important to keep your orchid in an area of the house that is free from draughts.
- When an orchid is experiencing drought, it is important to avoid exposing it to direct sunlight, as orchids thrive in bright, indirect light that provides enough energy for the plant to flower while also preventing damage to the delicate leaves from sunburn; furthermore, the amount of water required by the orchid increases with the amount of sunlight it receives, and if the roots are damaged by drought, they will be unable to supply moisture at the same rate as a healthy plant, leading to yellowing leaves and the eventual death of the orchid.
To rescue an orchid with yellow leaves from drought stress, the crucial step is to rectify the watering techniques by avoiding complete drying of the potting medium and instead waiting for the top inch of the medium to feel dry before watering.
It typically takes about a week to water most houses during the Summer and two weeks during the Winter, but it’s advisable to peruse my article on watering orchids to learn the proper way to water your orchid based on your climate and specific conditions, as there are various factors that can affect how frequently you should water your orchids to ensure their well-being.
To save your orchid, it is important to follow other recommended methods such as maintaining the ideal temperature range and protecting it from heat and drafts.
If there are living roots, the orchid has the ability to recuperate, even if the yellow leaves wither and fall off, as long as the environment becomes more conducive, fresh leaves can emerge.
Using transparent plastic containers is an effective method to stimulate additional development and expedite the recuperation process of orchids, since the roots of these plants can perform photosynthesis, which aids in supplying energy to the plant when the leaves are not in good condition.
Consider reading my article on selecting the optimal pots for cultivating orchids.
When fresh roots develop, the orchid begins to produce new green leaves that take the place of the withering yellow leaves, leading to the plant’s recuperation.
Check out my comprehensive guide on how to revive a dying orchid by reading my article.
Orchid Leaves Turning Yellow Because of Too Much Sun
One of the most frequent causes of yellowing orchid leaves is excessive exposure to direct sunlight, which can burn the leaves, as orchids are naturally found in forested areas and thrive under a canopy that shields them from direct sunlight, so if they are placed in a sunny window, their delicate leaves may turn yellow due to sunburn.
Orchids are suited to forest environments and cannot withstand strong sunlight, but they can thrive in partially shaded areas, although it is best for them to be exposed to bright, indirect light to ensure they have enough energy to bloom without being harmed by sunburn.
The color of orchid leaves that have been exposed to the sun appears to be a combination of yellow and brown, resembling a scorched appearance, with the most noticeable effect being on the leaves that are directly facing the sun.
Although orchids can survive as a whole, the individual leaves that have been sunburnt do not regain their green color or recover from their scorched appearance.
When the leaves of an orchid are burned, they lose their ability to perform their functions effectively, leading to the plant’s overall decline, and the leaves may eventually become brown, wither, and drop off.
When a plant is affected by sunburn, it typically experiences drought stress as well, since the strong sunlight dehydrates the leaves, potting soil, and roots at a faster rate, resulting in wilted leaves and stems, as well as damage to any flowers.
If you relocate the orchid to a location with better conditions, it can rejuvenate and produce fresh foliage.
How to Save Yellow Orchid Leaves from Sun Burn
- When growing orchids at home, it is crucial to position them in a spot with bright, indirect light to prevent harm to their delicate leaves caused by excessive heat; since orchids are accustomed to the shade of the forest canopy, it is essential to replicate this environment by refraining from exposing them to direct sunlight.
- Instead of cutting them off, it is better to wait for the damaged leaves to fall off naturally, as the sunburnt yellow leaves will eventually turn brown, wither, and drop off from the orchid when they are ready, and removing them manually can harm the orchid.
- For optimal recovery, it is recommended to transplant your orchid into a transparent plastic container; orchids have a unique ability where their roots can perform photosynthesis, a function typically reserved for leaves, which becomes useful when the leaves are damaged and unable to perform photosynthesis, allowing the orchid to recover; transparent plastic pots are preferred as they allow light to penetrate the roots, providing the necessary energy for the orchid to grow new leaves and function properly.
With proper care, the orchid has the ability to produce new leaves, albeit smaller in size, and eventually regain its health.
The speed at which the orchid recuperates from yellow leaves caused by sunburn is contingent on the extent of the harm inflicted, and if only a few leaves are affected while others remain sheltered from the sun, the orchid typically bounces back at a faster pace.
Even if the orchid loses all its leaves due to damage, it can still exhibit indications of recuperation in the subsequent weeks, albeit at a slower pace and over a more extended period.
Too Much Fertilizer Turns Orchid Leaves Yellow
Orchid roots are highly sensitive compared to other houseplants, and if you use regular houseplant fertilizer, they can easily burn and die.
When orchids receive an excessive amount of fertilizer, their roots get burned, leading to their death, and the burnt roots lose their ability to transport water and nutrients, which results in the yellowing of the orchid leaves, indicating stress.
Orchids do not require excessive feeding, but they can benefit from a specific type of fertilizer designed to promote robust development and stimulate blooming.
A fertilizer that is specially formulated for orchids has the appropriate balance of nutrients that orchids need to flourish, and it also minimizes the chances of the roots being damaged by excessive salt buildup or burning, which can impede the orchid’s ability to absorb water, resulting in yellowing of the leaves.

Overuse or excessive potency of fertilizer can lead to droopy leaves and a lack of blooms in orchids.
How to Save Orchid With Yellow Leaves due to Excess Fertilizer
- To reduce the amount of fertilizer used, rinse the orchid roots and potting medium under a gentle flow of water from the faucet for approximately 10 minutes, which will dissolve any excess salts that may have accumulated due to frequent fertilizer use, allowing the roots to better absorb water as needed; however, this is only a temporary fix, and it is recommended that the potting medium be replaced for the orchid to fully recuperate.
- To ensure proper drainage, it is recommended that you allow water to flow through the drainage holes and let the top layer of the soil dry out for a week.
- It is recommended to examine your orchid’s roots after a week, which can be done easily if you have a transparent plastic pot, but if not, you can remove the orchid from the potting medium to inspect its roots, and healthy roots should be green or light gray in color and feel plump.
- If you notice any roots that have turned brown, black, or thin and white, it means that those roots are dying, and you should cut them off at the base of the orchid because they can no longer transport water or nutrients around the plant.
- To give your orchid a better chance of recovery, transfer it to a new potting medium made of pine bark chippings or a specialized orchid potting mix, but avoid using moss as it retains too much moisture and can lead to root rot, and this new mix will not contain any accumulated salts or harmful effects of excess fertilizer.
- If any of the leaves of the orchid have turned yellow, they will eventually fall off without any intervention, and it is not advisable to try to remove them while they are still attached as it may harm the plant.
If you follow the recommended care practices for orchids, the plant will likely recover in a few weeks, and you can expect new leaves to appear during the Spring and Summer seasons, but the extent of root damage will determine the outcome.
When feeding orchids, it is crucial to stress the use of a specialized orchid fertilizer (which can be found at garden centers and on Amazon) instead of a typical houseplant fertilizer.
Orchids prefer to grow on trees and obtain nutrients from rainwater or water vapor in their natural environment, as they are epiphytes, and their roots are too delicate for regular fertilizer.
To ensure healthy orchid growth and promote flowering, it is important to use a specialized orchid fertilizer, following the manufacturer’s instructions regarding frequency and quantity.
Cold Temperatures Cause Orchid Leaves to Turn Yellow
Orchids are highly susceptible to low temperatures and necessitate a temperature spectrum of 55°F during the night and a maximum daytime temperature of 75°F.
If the temperature drops below 55°F for a prolonged period, orchid leaves may turn yellow as a sign of stress, although they can withstand occasional dips in temperature.
If an orchid is exposed to a draft or placed near a cold window, especially if its leaves touch the cold window pane, it is common for this to occur.
The presence of low temperatures can also lead to the retention of moisture in the orchid potting medium, creating an environment that is conducive to the development of root rot.
Orchids are often underestimated for their hardiness, but regrettably, rescuing an orchid that has been damaged by the cold is a challenging task because they are highly susceptible to cold temperatures.
The orchid’s ability to recover from cold damage is contingent upon the severity of the damage, as severe damage may result in the orchid dying back and being unable to recover, while minor damage to a leaf or two that may have been exposed to a cold window can be overcome by the orchid.
For the orchid to have the highest possibility of recuperation, it is important to keep it in a room where the temperature remains constant, ranging from 55°F to 75°F, and to adhere to the recommended care procedures, including watering it once every 7-14 days and positioning it in a spot with bright, indirect light.
It is advisable to refrain from applying fertilizer to an orchid that is experiencing stress because doing so can encourage the growth of leaves when the plant is already struggling.
If your orchid experiences new growth that is green in color during the Spring and Summer seasons, it is likely to make a full recovery.
Orchid Leaves Yellow After Repotting
When orchid leaves turn yellow after repotting, it is usually because of transplant shock or being planted in potting mediums that hold too much moisture, which causes stress due to changes in temperature, humidity, air currents, light levels, or excessive moisture around the roots.
When you repot or relocate your orchid, it may experience a shift in its surroundings that goes against its ideal habitat.
To rescue it, you must rectify the environmental conditions that are inducing the strain.
It is recommended to repot orchids every 2-3 years to ensure that the roots have enough space in a potting medium that allows for proper oxygen circulation, which is essential for root respiration, and the ideal potting medium for orchids is pine bark chippings because of its porous structure that promotes drainage and maintains root health.
When an orchid is transplanted into either moss or potting soil, the roots are surrounded by materials that hold onto too much moisture, leading to a lack of oxygen that results in yellowing leaves and ultimately the death of the orchid.
For a thriving orchid, it is recommended to use pine bark potting mediums or specialized orchid bark-based potting mixes instead of moss or regular potting soil when planting.
When planting orchids, it is crucial to choose the right pot that has drainage holes at the bottom.
Regularly emptying the saucer of excess water is crucial for orchids that are placed in a decorative outer pot or on saucers or trays to avoid water spillage, as these plants cannot endure having their roots in saturated soil.
If your orchids have been sitting in water because of saucers, trays, or decorative outer pots, you should refer to the instructions for rescuing an overwatered orchid at the beginning of the article.
If the orchid is placed in a well-lit area with indirect sunlight and the temperature is maintained between 55°F and 75°F, it should be watered thoroughly once every 7-14 days, protected from drafts, and misted every few days to create a humid environment, allowing it to adapt after being repotted in the coming weeks.
Check out my piece on how to bring a drooping orchid back to life.
Key Takeaways:
- Yellow orchid leaves are frequently caused by root rot, which is typically due to excessive watering and poorly draining soil, and if the roots of the orchid are affected by root rot, they lose their ability to distribute water and nutrients throughout the plant, resulting in yellowing of the leaves.
- If the roots of an orchid are surrounded by excessive moisture, it can lead to root rot, causing the leaves to turn yellow; this is often caused by the retention of moisture in moss and regular potting soil, which can prevent oxygen from reaching the roots and cause them to die back, ultimately resulting in yellow leaves.
- Pine bark is a great choice for orchid potting because it promotes root oxygenation and drainage, preventing issues like root rot and yellowing leaves.
- When orchids are planted in pots that lack drainage holes or saucers beneath them, the roots of the orchids become waterlogged, leading to root rot, which in turn causes the leaves of the orchids to turn yellow.
- When the leaves of an orchid turn yellow, it may indicate that the roots of the plant have withered and perished due to insufficient watering, which causes the roots to recede and become unable to absorb water or nutrients, leading to leaf yellowing as a stress signal.
- The reason why orchid leaves become yellow is due to sunburn, as orchids are accustomed to growing in shaded areas in their natural habitat, making their leaves highly susceptible to direct sunlight, which causes them to scorch and turn yellow when exposed to full sun.
- If orchids receive excessive fertilizer, their leaves may turn yellow, as they are not heavy feeders, and the roots may burn and stop functioning, leading to the death of the leaves.
- If orchids are exposed to temperatures below 55°F, they may turn yellow, as they are highly sensitive to cold temperatures, and if their leaves come into contact with a cold window pane or are in a cold room, they will turn yellow as a sign of stress.
- When orchids are repotted, their leaves may turn yellow due to the shock of being transplanted, which can be caused by a variety of factors such as changes in the potting medium, temperature, airflow, or humidity, all of which can lead to stress; furthermore, if orchids are repotted in moss or potting soil instead of pine bark, this can also cause the leaves to turn yellow, which is a sign of root rot.